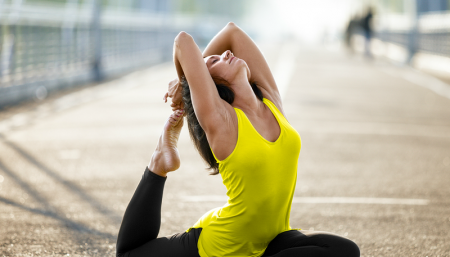
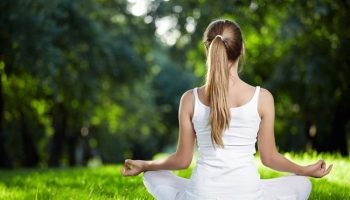
To play golf, one needs to be loose, relaxed and have a free mental spirit. Yoga can help the golfer with all of these. Weakness or lack of flexibility in one part of the body can affect the golf swing, as stronger muscles try to compensate. Your yoga routine should work the arms, back, chest, legs, and abdominal areas. Many golfers complain of lower back pain from repeated spinal rotation from swinging the golf club during a game. Increasing flexibility in the spinal is key to preventing injuries. One of yoga’s major benefits is improving core strength. Stronger trunk muscles result in more spinal support and less strain on the lower back.
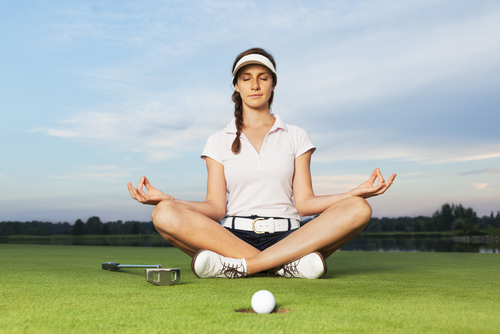
You can incorporate these yoga asanas in your routine before you hit the golf course to warm up your body and cool down your competitive mind.
Vrikshasana or Tree Pose
- Stand and place your feet together. Put your weight on your left foot and bend your right knee.
- Put the heel of your right foot on your left thigh and push your hips out.
- Raise your arms over your head. Keep this pose for 25 seconds and then repeat on the other side. This pose will help your balance.
Eka Pada Rajakapotasana or Pigeon pose:
Golfers tend to hold tension in the hips and a tight rigid hip for an athlete will always result in more energy and stress released to the more vulnerable joint which is the knee. The reaching twisting variation you can do with this pose will also help to open the ribs increasing breath capacity and deepen the stretch in the opposite quadriceps.
- From Downward Facing Dog, step both feet together and bring your right knee forward between your hands, such that your outer right leg is resting on the mat.
- Drop your back leg to the ground. Keep the back leg turned under.
- Keeping your front leg bent, place it shin down on floor behind your right wrist.
- Align your right knee straight in front of your right hip and your right shin parallel to the front of your mat.
- Lower your hips, bringing your left knee to the floor and walk your left foot back a few inches to straighten your left leg directly behind your left hip. Rest the top of your left foot on the floor.
- Walk your fingertips out to 18 inches in front of your right shin and bring your elbows to the floor, forearms parallel to each other.
- Draw your right hip back, and your left hip forward
- Take quite a few breaths in Pigeon (3-7 breath) . Make sure your front foot is well flexed. You may feel this pose in your hips as they open up.
Ardha-Matsyendrasana
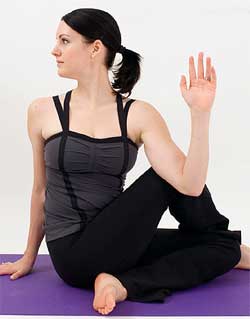 This pose is to build strength and stability in the anterior and posterior spine and to open up the spinal column increasing the rotations. It syncs the movement with breathing and settles the athlete down.
- Kneel down with your legs together, resting on your heels.
- Then sit to the right of your feet.
- Lift your left leg over your right, placing the foot against the outside of the right knee. Bring your right heel in close to your buttocks. Keep the spine erect.
- Stretch your arms out to the sides at shoulder level, and twist around to the left.
- Now bring the right arm down on the outside of the left knee and hold the left foot in the right hand, placing your left hand on the floor behind you. As you exhale, twist as far as possible to the left. Look over the left shoulder.
Anjaneyasana (Crescent Lunge)
Anjaneyasana or crescent lunge is a powerful standing yoga pose that stretches and flexes your entire body.
- This variation, with a twist, increases the challenge of balancing, while also stretching out the spine, shoulders, and chest. Begin in Downward-Facing Dog ( Adho Mukha Svanasana). With an exhalation, step your right foot forward between your hands. Bend your front knee to 90 degrees, aligning your knee directly over the heel of your front foot. Your feet should be hip-width apart with both feet facing forward, and your front shin should be perpendicular to the floor. Come on to the ball of your back foot, lifting your heel and drawing it forward so it aligns directly over your back toes. Lift your back leg strongly, drawing your knee and quadriceps up toward the ceiling. Straighten your back leg completely.
- With your back leg strong and active, gently draw your left hip forward as you press your right hip back, squaring your hips so they are parallel to the top edge of your mat. If it is too difficult to keep your back leg raised while keeping your toes on the mat, lower your knee to the floor and slide your leg back a few inches. Un-tuck your back toes and rest the top of your back foot on the floor.
- Inhale as you raise your torso to an upright position. Sweep your arms overhead. Draw your ailbone toward the floor. Spin your little fingers toward each other, opening your arms so your palms face each other. Gently tilt your head and gaze up at a space between your thumbs. Make sure your front shin stays vertical. Widen your stance as needed to make sure that your knee does not move forward past your ankle. Tuck your tailbone under and engage the muscles of your abdomen to help stabilize your core. Extend up through the crown of your head, lengthening your upper body. Draw your shoulder blades firmly into your upper back.
- Draw your lower front ribs in and down toward your belly — do not let them poke forward.
- Hold for up to one minute. Release your hands back to the mat and step back into Downward Dog. Repeat on the other side.
Virasana or Hero pose
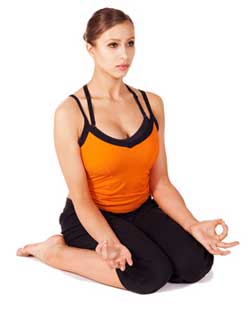 This sport puts a lot of stress on the bottom of the foot, with the strong push when finishing the swings.
- Kneel on the floor (on a folded blanket to pad your knees, shins, and feet if necessary), with your thighs perpendicular to the floor, and touch your inner knees together. Slide your feet apart, slightly wider than your hips, with the tops of the feet flat on the floor. Angle your big toes slightly in toward each other and press the top of each foot evenly on the floor.
Exhale and sit back halfway, with your torso leaning slightly forward. Wedge your thumbs into the backs of your knees and draw the skin and flesh of the calf muscles toward the heels. Then sit down between your feet. - If your buttocks don’t comfortably rest on the floor, raise them on a block or thick book placed between the feet. Make sure both sitting bones are evenly supported. Allow a thumb’s-width space between the inner heels and the outer hips. Turn yourthighs inward and press the heads of the thigh bones into the floor with the bases of your palms. Then lay your hands in your lap, one on the other, palms up, or on your thighs, palms down.
- Firm your shoulder blades against the back ribs and lift the top of your sternum like a proud warrior. Widen the collarbones and release the shoulder blades away from the ears. Lengthen the tailbone into the floor to anchor the back torso.
- At first stay in this pose from 30 seconds to 1 minute. Gradually extend your stay up to 5 minutes. To come out, press your hands against the floor and lift your buttocks up, slightly higher than the heels. Cross your ankles underneath your buttocks, sit back over the feet and onto the floor, then stretch your legs out in front of you. It may feel good to bounce your knees up and down a few times on the floor.
Bhujangasana or Cobra pose
- The cobra pose stretches tight chest muscles and strengthens the back of the shoulders and the upper back, working as a corrective exercise for rounded shoulders.
- Lie on your belly, while your head rests on your lower arms.
- Raise your forehead, look upwards and stretch your hands backwards. Let your weight rest on your chest.
- The head falls a little backwards towards your back and the backward movement proceeds from the neck and the chin. Move your belly further backward as if someone is pulling your arms. The weight is more and more shifted towards the belly and the lower back does the real work.
- If you cannot raise your chest any further, put your hands and arms next to your chest on the mat without losing the bend. Stretch your arms so that they stand perpendicular on the floor and at the same time turn your arms a little inward. Relax your lower back and bear your weight with your arms.
- The buttock muscles remain relaxed during the exercise. Move your chest further upwards with every breathing out. Do this in a relaxed way instead of using force. You can tilt your head back. The shoulders are broad in front and the shoulder blades remain low.
Wind up these asanas with corpse pose and meditation. Proper breathing and relaxation keep the mind focused and calm.
Disclaimer
The Content is not intended to be a substitute for professional medical advice, diagnosis, or treatment. Always seek the advice of your physician or other qualified health provider with any questions you may have regarding a medical condition.
