This total body workout targets the upper and lower body with a variety of exercises that can be done while seated. Although a greater proportion of you rests on the floor, the increase in sensory response provided can give you even more of an idea of where you core is and how you lift. Always come to the floor exercises fresh. Feel your seat bones on the floor and lift your body up from them. Allow the hips to hinge; do not collapse them and bend from the spine. Most of all, remember that any Forward Bend comes from the hips, regardless of the length of the legs.
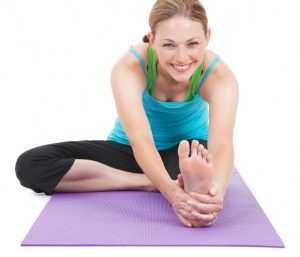
![]() Seated Forward Bend
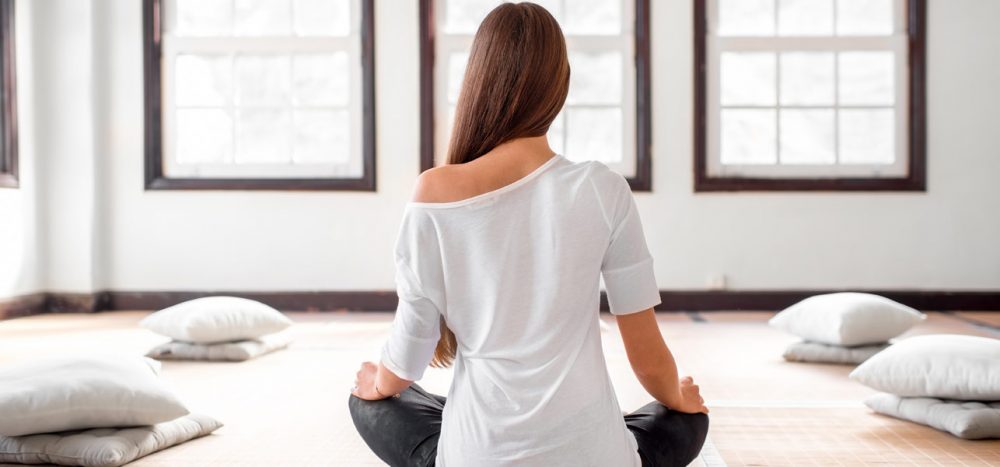
Seated Forward Bend
- Let your head relax so that your neck is long, and make your tummy as long as possible. After all, the longer the tummy, the longer your lower spine, and that means the deeper you hinge forwards. Think of lengthening your lower spine out of your hips, as opposed to dragging yourself forwards with your arms, and you’ll find that any injury is very unlikely. You will also begin to understand more this feeling of a hinge. If you get the chance, ask someone to give you a push there. It’s quite safe and feels lovely.
- When you can, let the head bow and relax, as you did in the standing Forward bend. Once again, you should feel that your spine is lengthening up, out and away from your hips. Extend your arms, relax and take time to breathe.
- Sit up. Place your hands behind your bottom, slightly wider than shoulder width, which makes it easier to find your back strength until the flexibility of your shoulders appears. As you push up, keep your elbows soft and try to get your chest higher than your shoulders. Try to lengthen the front of your body, and you should find this helps to provide some more strength to stay up. If you find that dropping your head back all the way is difficult, either open your jaw wide or lengthen the back of your neck.
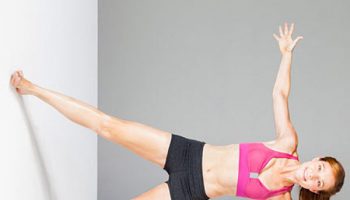
- The table is similar to the Side Triangle, in that you should feel as if you are making a tunnel underneath you. This means really having to find the muscles of your back, especially those that draw the shoulder blades down the back. When you find these, you will feel that they are responsible for lifting the chest higher and higher, opening the front of the shoulders and chest. So find the floor, push up and make a tunnel.
- If you have inflexible ankles, then really extend your toes to the floor, and not only will your ankles open but your arches will also improve. The more you can push down with your feet, the more you can engage the backs of the legs to help you lift. After all, they’ve been lengthened in the previous posture and now it is their chance to be strengthened in this one. Use your feet and feel the floor.
- Try not to lock your elbows, since this hyper extends them and takes the weight out of the muscles in the back and into your joints. If you can, keep working on getting your shoulder blades flat to your ribs, as this will really help to open your shoulders
This posture is also known as the Butterfly hinge. Look at how the legs have opened right up, like wings. There is a lightness within the hips that allows this. Open the hips and revisit these postures as many times as necessary, to enable you to find this lightness in their separation.
- Sit down from the Table and bring your heels towards your bottom as far as is comfortable. Holding your feet or ankles for support, lift your pubic bone up and try not to lean backwards. The higher you lift, the more your knees will spread apart.
- From rolling back, pull your tummy up and in to lift you upright. As you do this, keep the fooling of separating the knees within your hips. These are separate and distinct sensations that do not seem to fit together, but practice will show that they do.
- If your inner thighs will not give in, use your arms to help maintain the length of your spine. Pulling the tummy up and in helps in two ways. It stops the lower spine collapsing and, second, the more you lift up, the more likely you will be able to release your inner thighs.
- It may take a very long time for your hips to open sufficiently to allow your head to reach the floor, but wherever you get to in leaning forwards, remember that the more open your hips, the more space you have to roll forwards and through. Spend time getting your knees towards the floor before worrying yourself over how far you are from the floor. Spread your knees and hinge from the hips and your spine will look after itself.
![]() Bridge
Bridge
Think of the arc beneath a bridge – the smoother the arc, the stronger the structure. So when you attempt this posture, remember to keep as long an arc as possible in your back. This will prevent you from putting the bend on one part of the back, which always leads to discomfort.
- From the cobbler, lift your pubic bone up between your legs, and you’ll find you begin to roll backwards. As your lower spine begins to near the floor, your legs will feel light enough to bring them into parallel lines with a nice bend in the knees. Keep lifting your pubic bone up to roll you down, and, as your spine unrolls on the floor, bring your heels as close to your bottom as is comfortable.
- Once on the floor, lay your hands on either side of your body. Pushing your forearms and hands down. This will help you to feel the muscles between you shoulder blades. Then press your heels down to feel the floor and keep rolling your pubic bone up between your legs. The thighs will feel the major work. If they don’t, the lack of pubic lift will mean your lower back will begin to constrict.
- The Bridge or the Big Back Bend has a status much the same as the Forward Bend or Handstand within a yoga class, for it shows everyone you have a flexile back. Try to think about being upside down, as if you have been walking on your hands and feet and a giant has turned you the wrong way up. This will make you feel as though you are pushing up not just with your arms but your legs and tummy as well. If you can play in this posture, move and sway. Try picking limbs up from the floor to reaffirm where your lift comes from. You are upside down, so be light-hearted and play.
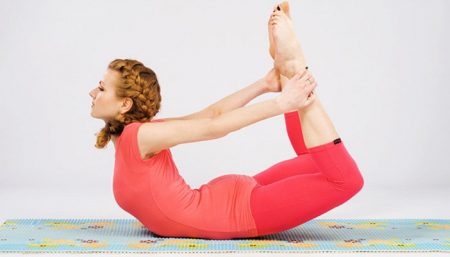
![]() Double Pigeon
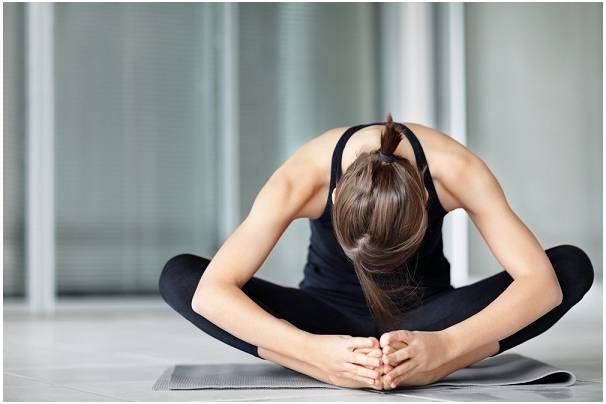
Double Pigeon
- The action of placing one shin upon the other will, for some, be beyond the accommodation of their hips but if the shin does lie almost flat, then trust in your tummy strength and the hip will open up. As you sit there, sit as tall out of your hips as is possible.
- Push your top knee down and lift your pubic bone between your legs. You will feel the tummy pull in and the knees spread. Do not lean backwards, just roll your hips up and back. Stay here and feel the spread in the legs.
- Keep sucking your tummy in and up until you feel your hips begin to roll forwards. Keep rolling them forwards, up and over your legs, until you find yourself over your legs. Push your bottom down and back, pull your tummy in and up and lift your chest up by using the muscles of your upper back. This will extend your spine and allow you to find space within your hips and lower spine.
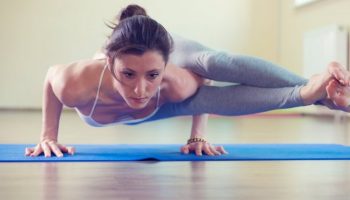
![]() Batfink
Batfink
In this posture you wrap your arms around your legs as though you were cloaking them in bat wings. This will keep your back open and broad while you curl your pubic bone up and draw your knees to your chest by pulling your tummy away from your thighs.
- Start by balancing on your bottom and, while maintaining your balance, learn to curl your pubic bone up and your tail between your legs, as this is the beginning of extending your spine into a long. Smooth “C” shape. You have to hold this “C” shape in order to have a smooth roll from bottom to shoulders and back up again. Let your arms go forwards and your chest backwards since this will help you round and open your upper spine. You do not want to throw yourself up and down with the momentum from your legs, so spend some time here until you feel that you have the smoothest “C” back you can possibly get.
- Rolling back and up is fun. You get a lovely feeling of massaging the muscles along your back and the impression that you are a child’s toy. The art of rolling back and up lies in your pubic lift, as this will keep any gaps or holes in your back that does not wish to roll with the rest of your back on the floor. Notice how the body is still in exactly the same position even though it has been turned on to the space between the shoulder blades.
- Alternative If there is no way your spine will allow you to roll back and forth, assume this position. Keep lifting your pubic bone into your tummy, while keeping the knees relaxed above your hips. This will strengthen your abdomen and allow you eventually to roll through the hips.
![]() Tortoise
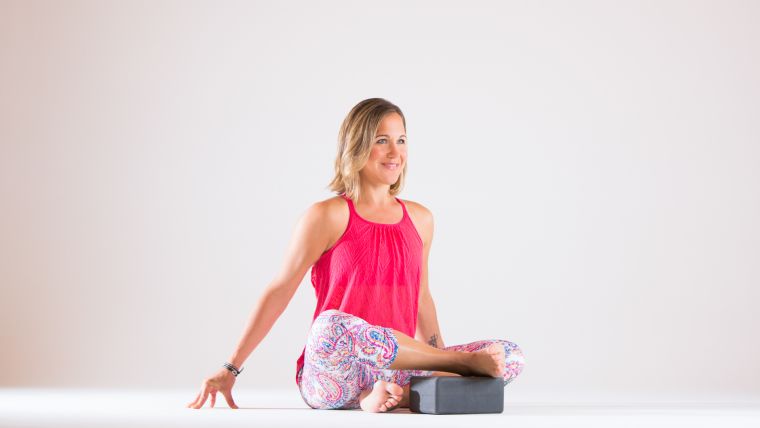
Tortoise
The Tortoise can unlock the deep places where we store our tension.
- The Tortoise posture is all about coming forwards. Just as a tortoise extends its head out of its protective shell, you have to figure out how to pull your body up and forwards out of your hips. Put your arms under your bent legs and extend forwards. The posture demonstrated here is more than deep enough for most people, since it requires you not only to roll your hips forwards between your legs but also to extend your spine forwards and up from your rolled hips. The result is an intense sensation in the hips and lower spine.
- This is a real challenge since both your legs and your body have to go forwards away from your hips. The arms extend backwards, away from the head. This is going beyond the Forward Bend you are used to, since you have to take your body beneath your legs. However, remember that the bend originates inside the hips, not through dragging your spine between your legs. Whatever you do, keep your back long and take time to feel the groin open up to give the hips space to move through.
- Alternative If your hips allow for very little play, follow this example. Use your arms as struts to help lengthen and lift your spine up and out of your hips. Not only will this feel more comfortable, but it will also put you in touch with the tummy lift. This lift, when strong enough, will allow your muscles around the hip joint to soften so that the hips can then hinge closer to the thighs. If you find yourself here, then you need to pay more attention to all the Forward Bend exercises.
![]() Shoulder stand
Shoulder stand
There are many benefits to practicing inverted postures, primarily because it flushes the head and neck with a large supply of blood. This not only helps to relax you and release tension from your head and neck, but may also leave you feeling clearer and fresher than when you began.
- Lift your pubic bone up into your tummy until your legs are rolling over your head. Lift your shoulder blades up off the floor. Any neck pain should disappear when you work the back muscles hard to lift the shoulder blades up off the floor.
- If resting your knees on your head strains your back, try this version, as it demands a long spine. Basic rules: if your neck hurts, then lift your shoulder blades up off the floor. If your spine or lower back hurts, then take your hips backwards away from your head.
- Follow the same two rules. If your neck hurts and feels tight, lift your shoulder blades up and away from the floor. (Persistent pain means don’t be silly, stop doing it and seek advice.) Second, if your lower spine aches, then take your hips back away from your head
- Then warm your kidneys with your hands and stay there, constantly feeling the lift, for as long as you feel comfortable. There are many benefits, so practice and learn to feel them. Please note that women are not advised to practice inverted postures during the first three days of menstruation.
![]() Fish to Corpse
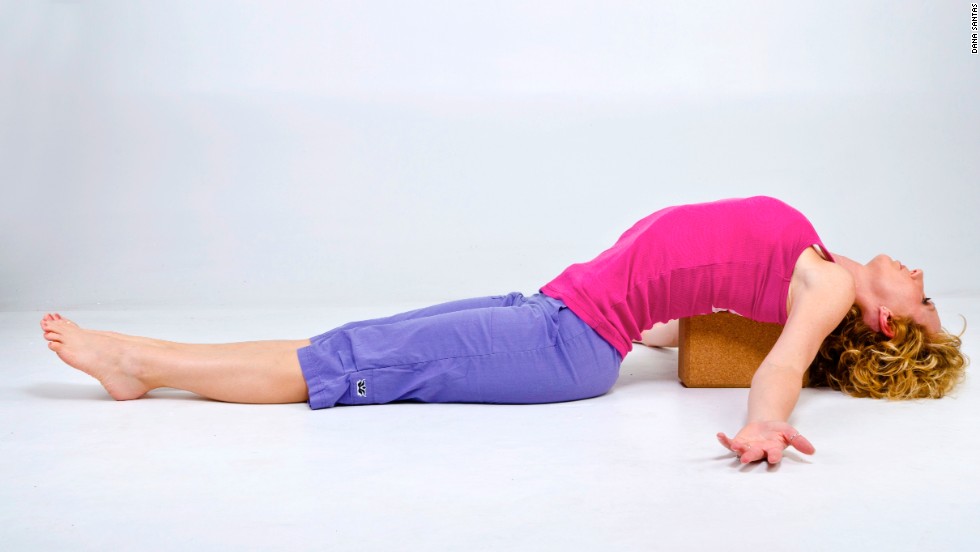
Fish to Corpse
These three postures flow into each other and lead you into a deeper state of relaxation. The Fish helps you extend and open the front of your body. The Baby pose helps you be aware of the expansion of your spine and the freedom of your hips. Corpse lets you become aware of this space.
- Fish – This a classic counter pose to end with after a shoulder stand. The reason why can be seen in the neck. Having compressed the front of the neck and lengthened the back, the pushing of the elbows down and the arching of the upper back can allow you to drop your head right back until the top of your head rests on the floor. Remember to stretch your legs and lengthen your tummy, so that you feel as though the arch in the top of your body is grounded in the rest of it. As you do this, try not to make the arch come solely from your lower spine, as this may make your back ache when you slowly lower yourself down. Most of all, open your chest. Breathe into the space between your shoulder blades and, as you breathe out, lengthen your waist.
- Close-up – This angle shows the positioning of the hands and that the emphasis is most certainly found in lifting and opening the chest. See if you can find out how to arch your upper back without having to overarch your lower back. Breathe deeply into the top of your chest and open the space between your shoulders.
- Baby – If you find your lower back aches at any point at the end, come into the Baby pose. Use this posture to find out just how long your spine can get. Ground your sacrum and coccyx on the floor while pulling your knees down into your armpits, as this will open your hips and flatten your lower spine. Make sure that your ribs do not stick up, as this will leave you with a hollow under your ribs, and keep your shoulders away from your head.
- From the Baby you know it is time to relax, so lower both heels to the floor with a bend in the knees. This should make sure that your spine feels long and flat on the floor.
- Let one leg go straight, but as you do so, notice how much of your spine pulls up and off the floor. This is owing to tension in the front of your hip. Allow your leg to let go and the spine to remain soft.
- Corpse – When you feel ready, allow your other leg to go straight and, once again, watch how the spine lifts. If your lower spine hurts with both legs down, then return to both legs bent and heels on the floor. Let go and be prepared to spend some time here.
![]() Chilling Out
Chilling Out
There is no question that when you’re tired you want to rest and that after resting you’ll feel better. Another simple fact is that when your muscles are relaxed, you tend to feel relaxed in your head too. When you have finished your practice, you may well find that you feel tired.
- Try lying on your front with the soft parts of your body on the floor. You’ll discover that it is very easy to find this sinking feeling when there are no bony parts of you causing discomfort. We come back to the scientific law that states that for each action, there is an equal and opposite reaction. So, the harder you work, the better you’ll rest. When you know just where the tired muscles are, it is easier to relax them. Equally, the harder they work, the easier it is to get them to relax. What you end up with is a body ready and willing to relax. If you repeat this regularly, you will learn to know the feeling of letting go. Eventually this awareness will be with you all the time, not just after exercise.
- Roll on to your back and keep that feeling of sinking that you found on your tummy and let your body go “splat”, including your bony parts. Check your hips are open and your shoulder blades are broad and allow your chest to open. Let go, it’s the end.
- As you lie there, you will want to think and be active in your head. So get as far away from your head as you can by finding and mentally feeling your feet with your consciousness. Physically do nothing and mentally take a holiday to your toes. Your mind will want you to fidget, move, think or imagine. It will cling madly on to any source of entertainment, even down to counting your breathing or heart rate.
- Against the wandering mind, you have an advantage. You have your body beneath you, with its many thousands of impulses and sensations. If your mind wants to be busy, entertain it by watching, living, the sensations of you. This is true relaxation, meditation, chilling out – whatever you want to call it. But most of all, the beauty is that everything you’ve been wanting – release, a source of wellbeing – is you. Let go and feel.
Disclaimer
The Content is not intended to be a substitute for professional medical advice, diagnosis, or treatment. Always seek the advice of your physician or other qualified health provider with any questions you may have regarding a medical condition.