Top 10 Yogasanas for the Feet
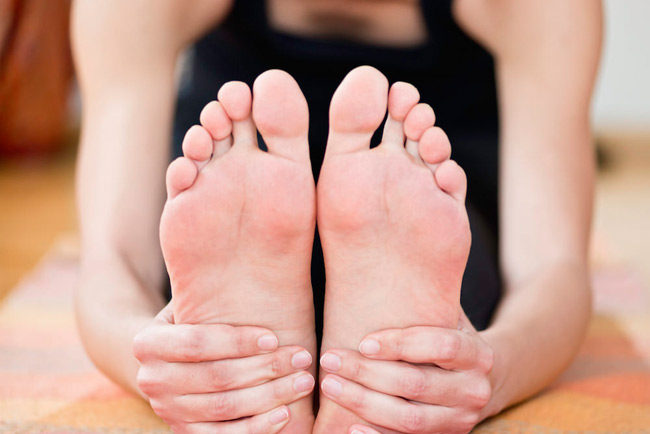
The soles of the feet are the beginning of the back of the body. Today, as people spend much more time sitting than walking and urban walking subjects us to unvaried, hard surfaces, the small bones and ligaments in the foot are limited in their range of motion. Walking on predictable, hard surfaces typically results in a clumping effect: The feet, ankles, and lower back become solid and fixed instead of sensitive and minutely adjustable. This rigidity and often painful foreshortening, especially in the back of our bodies, leave the feet, pelvis, and lower back immobile and vulnerable to displacement.
These patterns of distortion that lead to instability often start when we are very young. The body lines up over the feet, when a foot goes out of alignment the ankle, knee, pelvis and back follow. Analyzing the way we stand, walk, run and sit helps determine the cause of misalignment, which is most likely the culprit of pain. Finding and correcting the misalignment usually relieves the pain.
To counteract years of tension, here are 10
preliminary exercises that can help your feet come alive.
![]() Adho Mukha Svanasana (Downward-Facing Dog):
Adho Mukha Svanasana (Downward-Facing Dog):
One of the most widely recognized yoga poses, Downward-Facing Dog is
an all-over, rejuvenating stretch.
-
Come onto the floor on your hands and knees. Set your knees directly below
your hips and your hands slightly forward of your shoulders. Spread your
palms, index fingers parallel or slightly turned out, and turn your toes
under.
-
Exhale and lift your knees away from the floor. At first keep the knees
slightly bent and the heels lifted away from the floor. Lengthen your tailbone
away from the back of your pelvis and press it lightly toward the pubis.
Against this resistance, lift the sitting bones toward the ceiling, and from
your inner ankles draw the inner legs up into the groins.
- Then with an exhalation, push your top thighs back and stretch your heels onto or down toward the floor. Straighten your knees but be sure not to lock them. Firm the outer thighs and roll the upper thighs inward slightly. Narrow the front of the pelvis.
- Firm the outer arms and press the bases of the index fingers actively into the floor. From these two points lift along your inner arms from the wrists to the tops of the shoulders. Firm your shoulder blades against your back, then widen them and draw them toward the tailbone. Keep the head between the upper arms; don't let it hang.
Contraindications/Cautions
- Carpal tunnel syndrome
- Diarrhea
- Pregnancy: Do not do this pose late-term.
- High blood pressure or headache: Support your head on a bolster or block, ears level between the arms.
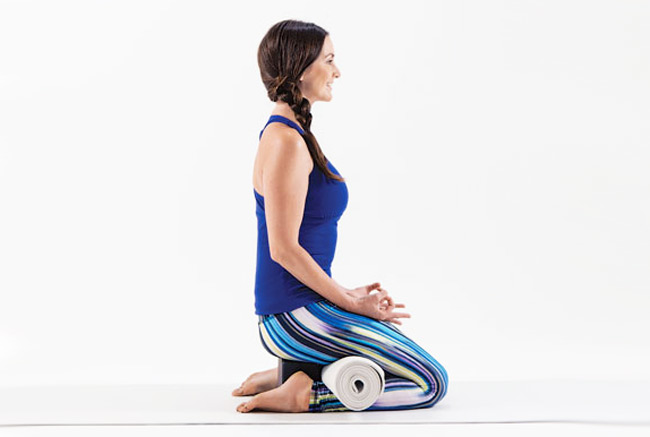
![]() Virasana-Hero Pose :
Virasana-Hero Pose :
The Hero Yoga Pose is one of the basic sitting postures, also excellent for meditation.
-
Kneel on the floor (on a folded blanket to pad your knees, shins, and feet
if necessary), with your thighs perpendicular to the floor, and touch your
inner knees together. Slide your feet apart, slightly wider than your hips,
with the tops of the feet flat on the floor. Angle your big toes slightly in
toward each other and press the top of each foot evenly on the floor.
-
Exhale and sit back halfway, with your torso leaning slightly forward.
Wedge your thumbs into the backs of your knees and draw the skin and flesh of
the calf muscles toward the heels. Then sit down between your feet.
-
If your buttocks don't comfortably rest on the floor, raise them on a block or thick book placed between the feet. Make sure both sitting bones are evenly supported. Allow a thumb's-width space between the inner heels and the outer hips. Turn your thighs inward and press the heads of the thigh bones into the floor with the bases of your palms. Then lay your hands in your lap, one on the other, palms up, or on your thighs, palms down.
-
Firm your shoulder blades against the back ribs and lift the top of your
sternum like a proud warrior. Widen the collarbones and release the shoulder
blades away from the ears. Lengthen the tailbone into the floor to anchor the
back torso.
- At first stay in this pose from 30 seconds to 1 minute. Gradually extend your stay up to 5 minutes. To come out, press your hands against the floor and lift your buttocks up, slightly higher than the heels. Cross your ankles underneath your buttocks, sit back over the feet and onto the floor, then stretch your legs out in front of you. It may feel good to bounce your knees up and down a few times on the floor.
![]() Vajrasana-Thunder Pose :
Vajrasana-Thunder Pose :
-
Kneel on the flour, keeping the knees together and the feet about 40 cm (16 inches) apart.
-
Soles of the feet should face upwards. Buttocks should rest on the floor. No part of the body should be on the feet. Wrists should be on the knees with the hands in any mudra.
-
Keep the back, the neck and the head erect and in one line.
This pose may be practised after the meals to remove heaviness in the stomach. It cures arthritis pains.
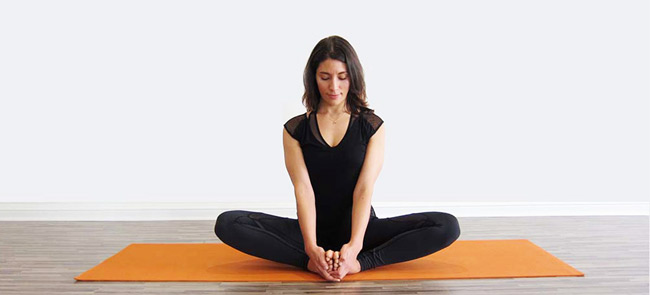
![]() Baddha Konasana-Cobbler
Pose :
Baddha Konasana-Cobbler
Pose :
-
Be barefoot. Sit on the floor or on a folded blanket on the floor with your legs stretched out straight in front of you.
Place one hand on your spine at the back of your waist. If you feel vertebrae poking out, then elevate your sitting bones with an additional blanket.
-
Lift the right leg so that the knee is aimed toward the ceiling and the foot is flat on the floor aimed forward. Keeping a tight fold in the knee and release it out to the right.
-
Repeat with the left leg so that the soles of the feet pressing each other. Clasp the hands around the toes. Keep constant pressure of the heels into each other. Hold onto a strap around the feet if your back or shoulders round.
-
Stretch your knees out laterally, to the sides, not down toward the floor to increase the stretch. Soften the gaze, quiet the hearing. Breathe evenly and comfortably through your nose.
![]() Squat (knees up, heels on floor):
Squat (knees up, heels on floor):
-
Stand with your feet a hip's width apart. Keep your feet flat on the floor, your trunk erect and lower back in its normal curvature. Slowly bend your knees into a squat position.
-
As you move into the squat, your hips should move slightly back and your trunk should incline slightly forward. Your back should remain in its normal curve.
-
Stop just before your thigh is parallel to the ground. Rise up (slowly!), relax and repeat 4-5 times. Make sure your heels stay in contact with the ground, which will stretch your Achilles tendon.
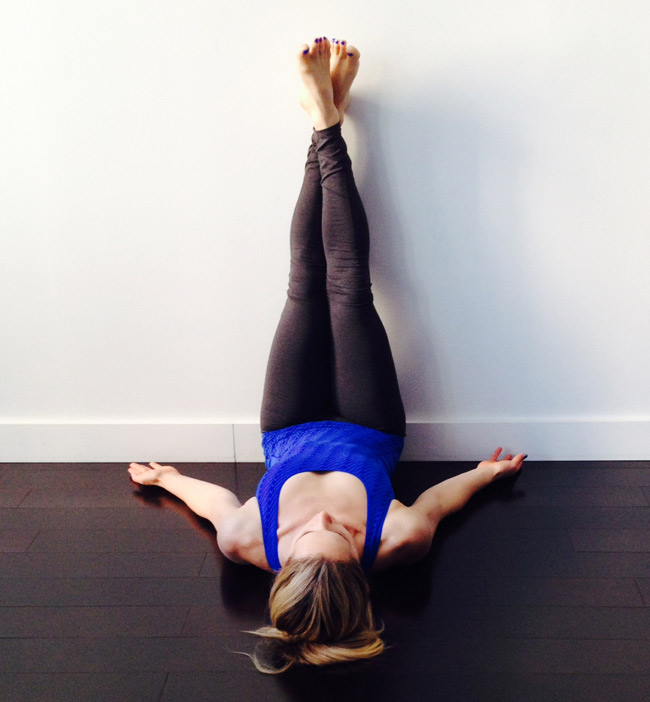
![]() Viparita Karani-Legs up the wall :
Viparita Karani-Legs up the wall :
Said to reverse the normal downward flow of a precious subtle fluid called amrita (immortal)
For your support you'll need one or two thickly folded blankets or a firm round bolster. You'll also need to rest your legs vertically (or nearly so) on a wall or other upright support.
-
Before performing the pose, determine two things about your support: its height and its distance from the wall. If you're stiffer, the support should be lower and placed farther from the wall; if you're more flexible, use a higher support that is closer to the wall. Your distance from the wall also depends on your height: if you're shorter move closer to the wall, if taller move farther from the wall. Experiment with the position of your support until you find the placement that works for you.
-
Start with your support about 5 to 6 inches away from the wall. Sit sideways on right end of the support, with your right side against the wall (left-handers can substitute "left" for "right" in these instructions). Exhale and, with one smooth movement, swing your legs up onto the wall and your shoulders and head lightly down onto the floor. The first few times you do this, you may ignominiously slide off the support and plop down with your buttocks on the floor. Don't get discouraged. Try lowering the support and/or moving it slightly further off the wall until you gain some facility with this movement, then move back closer to the wall.
-
Your sitting bones don't need to be right against the wall, but they should be "dripping" down into the space between the support and the wall. Check that the front of your torso gently arches from the pubis to the top of the shoulders. If the front of your torso is flat, then you've probably slipped a bit off the support. Bend your knees, press your feet into the wall and lift your pelvis off the support a few inches, tuck the support a little higher up under your pelvis, then lower your pelvis onto the support again.
-
Lift and release the base of your skull away from the back of your neck and soften your throat. Don't push your chin against your sternum; instead let your sternum lift toward the chin. Take a small roll (made from a towel for example) under your neck if the cervical spine feels flat. Open your shoulder blades away from the spine and release your hands and arms out to your sides, palms up.
-
Keep your legs relatively firm, just enough to hold thighs vertically in place. Release the heads of the thigh bones and the weight of your belly deeply into your torso, toward the back of the pelvis. Soften your eyes and turn them down to look into your heart.
-
Stay in this pose anywhere from 5 to 15 minutes. Be sure not to twist off the support when coming out. Instead, slide off the support onto the floor before turning to the side. You can also bend your knees and push your feet against the wall to lift your pelvis off the support. Then slide the support to one side, lower your pelvis to the floor, and turn to the side. Stay on your side for a few breaths, and come up to sitting with an exhalation.
![]() Ankle Circles:
Ankle Circles:
This exercise will feel great, and enhances circulation in your legs and feet. Sitting properly in a straight-backed kitchen chair, lift your left leg with knee straight and draw a circle in the air with your big toe. Reverse the direction of the circle. Be sure to keep your leg still. Repeat with the right leg.
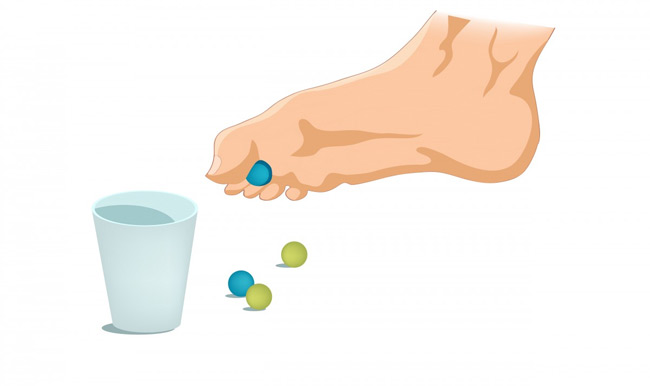
![]() Picking up marbles with your toes:
Picking up marbles with your toes:
- Sitting on a chair, with your feet resting on the floor
-
Using your toes, practice picking up
10 marbles - Repeat 5 times
- Perform
![]() Straight Leg Forward Bend
:
Straight Leg Forward Bend
:
Extend your right leg
forward resting on the back center of your right heel. Plant your left sole of
your foot firmly into the ground. Firm your upper right thigh and flex your
right foot. Try to make spaces between your toes pressing out of the ball of
your right foot. Please place your hands on your left bent knee and slowly lower
your chest towards your extended right leg. Take at least five patient deep
breaths and then go to the left leg.
![]() H Point and
Flex
:
H Point and
Flex
:
Scoot to the edge of your seat. Start with both feet planted into the floor. Extend your right leg resting your foot on the center back of your right heel. Firm your upper right thigh straightening your right leg to the floor. Inhale deep as you slowly point your toes, exhale slowly as you flex your foot back. Be sure to articulate your toes and the spaces between them as you breathe. Five times and then go to the left foot.
It is valuable to walk barefoot whenever possible. Both for the sake of a
clean house and to develop a greater feel for the surfaces under our feet, it is
a good practice to leave shoes at the door.
