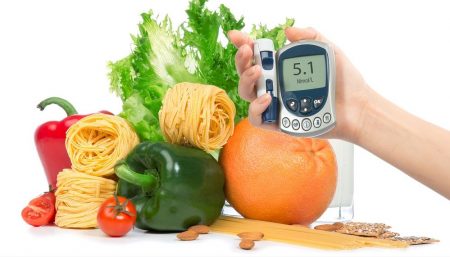
Diabetes means that the body does not produce or use insulin properly. Many studies have reported the beneficial effect of the practice of yoga on diabetes. Some studies have mentioned up to 65 percent beneficial effect of yogic therapy for diabetes.
Studies have confirmed that the practice of the yogic postures can rejuvenate the insulin producing cells in the pancreas of diabetics of both types, and that doing the postures in a relaxed manner, without exertion, yogic meditation and breathing help most patients to control the causes of diabetes.
Recommendations Regarding The Practice of Yoga by Diabetics
- The patient must learn to control and his or her self of diabetes in a holistic manner, at all levels of your being: physical, emotional, mental, intellectual and spiritual, recognizing the effects of stress, emotional imbalance, and dietary and living habits on the disease condition.
- Before beginning a program, measure your exercise toleration. Start with simple movements and positions before progressing gradually to complicated postures.
- Throughout the program, monitor glucose levels and under the supervision of a physician, and take appropriate medicinal dosages as and when required. After several weeks one may be able to reduce the dosages.
- Practice in the morning and the evening for 40 to 60 minutes the recommended series of postures according to ones capacity. Practice before meals, but after consuming glucid liquids.
- Perform the movements slowly and smoothly, stretching the limbs and joints, and gently compressing the abdomen, without straining. Maintain the postures for a comfortable length of time. The maintenance period of postures should be increased gradually from 5 seconds to one minute, or even longer depending upon the posture and capacity of the patient. Avoid exertion, that is heavy muscular activity.
- Focus on the breath during the maintenance period of the posture, with the eyes closed or focused on one point, as a means of learning to focus the mind and to manage stress and tension in the body.
- Perform the Shavasana, or complete peace relax pose on the back, systematically relaxing all of the parts of the body, at the end of the session, or after completing several postures, if one begins to feel fatigued.
- The practice of Uddiyana banda, or the abdominal squeeze has also been found to be useful.
- Regulate your diet by avoiding simple sugars such as white sugar, honey, glucose and sweets and eating complex carbohydrates such as wheat, oatmeal, buckwheat, corn, brown rice and beans. Avoid processed food and eat foods with lots of fibre and nutrients.
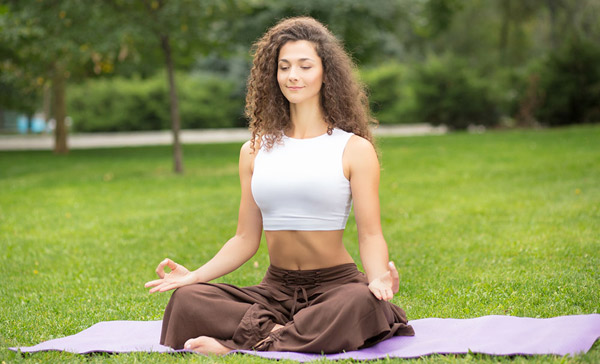
- Meditation practices have been shown to help the endocrine glands through relaxation of the sympathetic nervous system.
Yoga postures for Diabetes
The following postures have been found to be effective in the control and cure of diabetes (Sanskrit names; the English and Tamil names are in parentheses): Dhanurasana (Bow pose, Vilasana), Paschimottanasana (Sitting crane, Amarntha kokkuasana), Padangusthasana (Standing crane, Nindra kokkuasana), Bhujangasana (Serpent pose, Paambuasana), Sarvangasana (Shoulder stand) Ardha-matsyendrasana (Spinal twist), Halasana (Plough pose, Kalapoy asana), Yoga mudrasana (Yogic Symbol pose), Supta Vajrasana (Sitting pose of Firmness), Chakrasana (Wheel pose), Shalabhasana (Grasshopper pose, Vittelasana).
Instructions:
- Take prone lying position, legs together, hands straight by the side of the thighs, chin resting on the ground.
- Fold the legs at the knees and bring them on the thighs. Knees must remain together.
- Bring your hands backward and hold the toes of respective legs from the thumb and forefinger of the respective hands.
- Raise your legs a little up and simultaneously raise your head and chest.
- Holding the toes, pull the legs towards ears and bring the toes near the ear. Gaze in front.
- While returning to this original position, loosen your hands, take legs backward, let the thighs touch the ground, leave the toes and ultimately bring the legs and hand to the first position.
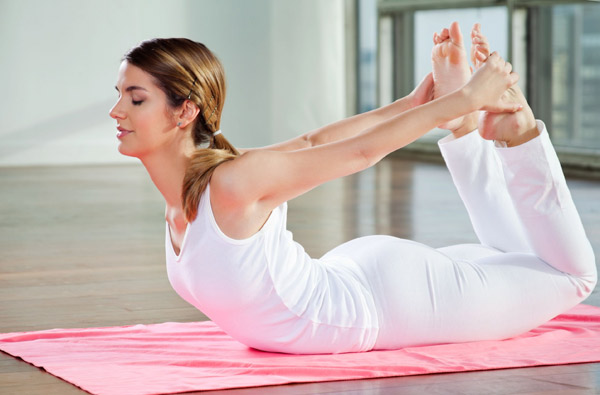
Remember:
- Do not try to bring the toes near ears forcefully if it is difficult.
- Gradually increase the practice.
Instructions
- Sit on a mat with your legs stretched straight out in front of you.
- Breathe OUT. Slowly bend forward, trying to touch your feet. Don’t bend your knees.
- If you feel a constriction while bending, straighten up slightly and then try and bend further forward.
- Don’t push yourself too hard. You may not be able to get very far if you are a beginner. Don’t get impatient and push yourself too hard. You will only injure your muscles. Just bend forward as far as you can go.
- It is important that you hold this pose. There is no point in just bouncing back and forth.
- Exhale, while returning to normal position.
Instructions
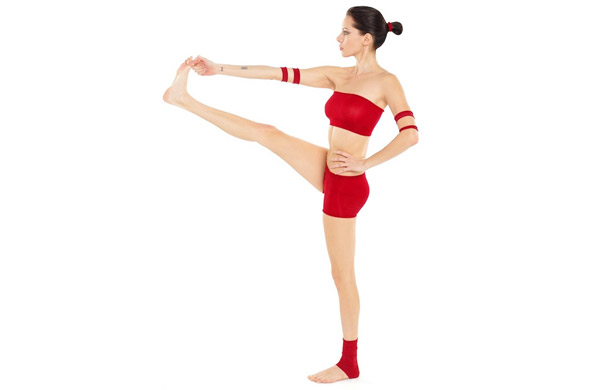
- Stand in Tadasana, hands on hips (feet together or hip width distance apart). Exhale and bend forward from the hip joints, not from the waist. As you descend draw the front torso out of the groins and open the space between the pubis and top sternum. As in all the forward bends, the emphasis is on lengthening the front torso as you move more fully into the position.
- If possible, with your knees straight, bend forward, wrap the index and middle fingers around the big toe, joining the thumb (“yogi grip”). With an inhalation straighten your arms and lift your front torso away from your thighs, making your back as concave as possible. Hold for a few breaths, then exhale and lengthen down and forward, bending your elbows out to the sides, using the biceps to assist going deeper into the pose. Keeping space between the shoulders and the ears, draw the shoulder blades down the back. Press the heels firmly into the floor and lift the sitting bones toward the ceiling. Turn the top thighs slightly inward.
- With each inhalation in the pose, lift and lengthen the front torso just slightly; with each exhalation release a little more fully into the forward bend. In this way the torso oscillates almost imperceptibly with the breath. Let your head hang from the root of the neck, which is deep in the upper back, between the shoulder blades. Stay in the position for 20 seconds.
- To come out of the pose, release the fingers, bring the hands to the hips and inhale, come up with a flat back.
Beginner’s Tip
- If student can’t reach the toes, have them hold the backs of their calves or thighs
Instructions
- Lie on your belly, while your head rests on your lower arms.
- Raise your forehead, look upwards and stretch your hands backwards. Let your weight rest on your chest.
- The head falls a little backwards towards your back and the backward movement proceeds from the neck and the chin. Move your belly further backward as if someone is pulling your arms. The weight is more and more shifted towards the belly and the lower back does the real work.
- If you cannot raise your chest any further, put your hands and arms next to your chest on the mat without losing the bend. Stretch your arms so that they stand perpendicular on the floor and at the same time turn your arms a little inward. Relax your lower back and bear your weight with your arms.
- The buttock muscles remain relaxed during the exercise. Move your chest further upwards with every breathing out. Do this in a relaxed way instead of using force. You can tilt your head back. The shoulders are broad in front and the shoulder blades remain low.
- Build up the exercise in a quiet way. When the lower back is stiff, this exercise may cause the lower back to feel a little painful and uncomfortable. This is normal and will pass away as the stiffness decreases. In spite of the uncomfortable feeling that you may sometimes experience, this exercise is highly recommended for people with a stiff lower back or pain in the lower back.
Instructions
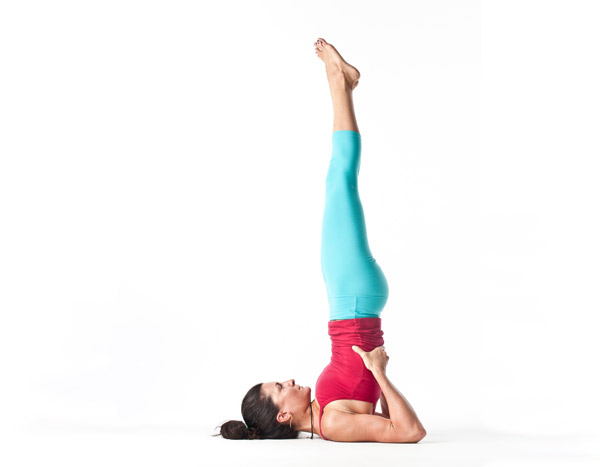
- Lie down flat on the floor, on your back, palms by your side facing down.
- Exhale and lift your legs up 30, then 60, then 90 and then around 130 degrees so they are extended behind your head.
- Stay in this position, breathing normally, for a few seconds.
- Now, gradually, exhale again, and straighten your legs up to 90 degrees, lifting your buttocks as well. Support the back of your trunk with your palms, keeping elbows on the floor. Gradually, walk your hands towards your shoulder blades, as you lift your body higher.
- Your elbows may tend to move outwards. Bring them in, so they are straight in line with your shoulders.
- You will notice that your hips tend to jut out backwards, while your feet tend to come forward over the head. This is not the right way to do it. Work at it so your body is in a straight line. Your hips, feet and shoulders should be aligned, so push your feet back and bring your hips and tailbone forward. Remember, this exercise is not as much about effort as it is about balance.
- Lift your body as high up as possible. Sarvangasana is a shoulder stand, so your body should be resting on your shoulders and not on your back.
- Hold this position for as long as possible.
- Remember to exhale while lifting your body up, but once your body is up, you can breathe normally.
- There is no need to hold your breath.
- Time yourself, so you can see how long you can remain in this position. The next time, try and balance your body for a little longer.
Instructions
- Sit extending both the legs together in front, hands by the side, palms resting on the ground.
- Fingers should remain together pointing forward.
- Fold the right leg at knee. Slowly set the right heel at the perineum.
- Now folding the left leg, bringing it from above the right knee, place it by its side on the ground. The knee of the left leg should remain towards sky.
- Now bring the right hand on the left side of the left knee. The left knee should remain at the left side of the right armpit.
- Now straighten the right hand and hold the toe or ankle of the left leg.
- Twisting the body to the left side, look backwards, place the left hand bringing it from the back on the right thigh. Gaze should be towards back.
- While returning to the original position first release the hand from the thigh and turn head forward.
- Now bring the back to normal position after loosening the right hand.
- Bring the left leg in original position.
- Now bring the right leg also original position.
- Repeat it similarly from the other side by folding the left leg first.
Remember:
- Some persons may experience difficulty in practicing it. If they cannot hold the toes of the left by right hand they should hold the ankle.
- If that also is not possible then hold the knee.
- While twisting backward twist the backbone turning well.
- Before resorting to the practice of this Asana practice Vakrasana.
Instructions
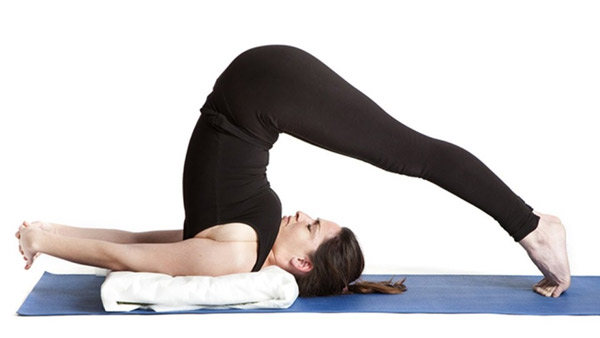
- Lie down with your back on a Mat.
- Your shoulders should lie on the edge and your head rests on the mat. Your legs are drawn in and still stand on the mat.
- Lift your hips off the floor and bring your legs up, over and beyond your head.
- At this point, lift your back and move your legs further beyond your head.
- Straighten your spine and keep your back straight. Move your hands toward your back.
- Place your arms against your upper back and try to place your hands as near as possible to the shoulder blades. Try to place your elbows at shoulder-width. If you cannot do this, put them at a somewhat wider distance from each other.
- By stretching your back and through relaxation in the muscles and through your position the legs slowly move further and further backwards. Try to relax the shoulders and the neck muscles through your breathing. If your breathing feels oppressed, the pressure in the heart area gets too big or your jaw is pinched off, you should walk backwards a little with your legs.
- Slowly bring your legs, one by one, back to the mat, stretch your arms lengthwise away from you and slowly roll off your back downwards, vertebra by vertebra.
It is advisable to lie on a yoga block with your neck and your back in order to relieve the neck muscles a little and to make the stretching of the back easier. There are three important movements in the Plough: 1) The upper back is stretched up to the top of the chest bone. This means that the upper back does not sink down and there is no bend in the back. 2) Through the upward movement from the upper back you get a movement in the direction of the chest bone 3) You stretch your pelvis upward from the sacrum, with the result that your chest bone gets more space. During this exercise you should try not to lose these three connections. In fact try to work them out further and further.
Yoga Mudrasana (Psychic Union pose)
Instructions
- Sit in the classic padmasana or lotus pose. If that is not possible, sit in the simple cross-legged pose called sukhasana (easy pose). Inhale. Reach hands behind, grasping fingers.
- Exhaling, lower your head to the floor, so your forehead touches the ground. If that is not possible, keep a bolster on which you can rest your forehead. Simultaneously, raise your hands to increase the pressure. Relax, continuing to breathe normally. Hold the final pose for as long as possible.
- Release, return to starting position. Repeat three times.
Avoid: If having lower backache or acute ulcer flare-up.
Instructions
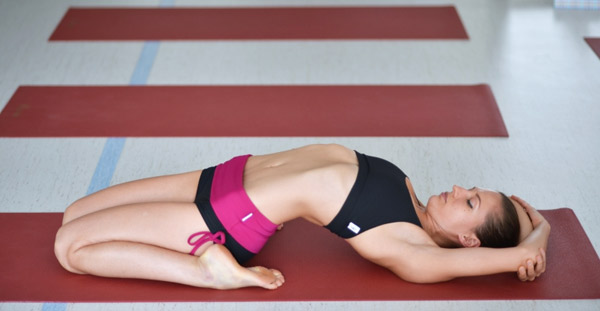
- Sit in Vajrasana.
- Slowly take the help of right elbow, then left elbow and place them on the ground towards backside.
- Slowly straighten you hands and completely lie on your back.
- Shoulders should rest on the ground. Beginners may keep their hands on respective thighs. Knees should remain together.
- After practicing this position well, making the shape of a scissor with both hands bring them under the shoulders. Right hand will remain under left shoulder and left under the right, head in the middle of them.
- While returning to the original position, first take out your hands and place it by the side of your body.
- Now, with the help of elbows sit as in the first position.
Remember:
- While lying on your back, control your weight. Do not jerk otherwise you may get injured (muscle pull).
- Those feeling trouble while practicing even Vajrasana, should not resort to the practice of this Asana.
- Beginners may keep their knees apart if they find it difficult to keep them together.
Instructions
- Lying on your back, bend both knees and place the feet flat on the floor hip width apart.
- Press the feet into the floor, inhale and lift the hips up, rolling the spine off the floor. Engage the thighs, buttocks and mula bandha.
- Place the palms underneath the shoulders with the fingers pointed towards the head and the elbows shoulder width apart.
- Inhale and press into the palms and straighten the arms to lift the shoulders and head off the floor.
- Keep the legs and arms as straight as possible to lift the hips and chest up.
- Breathe and hold for 2-4 breaths.
- To release: exhale and slowly bend the elbows to lower the head, neck and then shoulders to the floor. Bend the knees to slowly roll the spine and hips back to the floor.
Instructions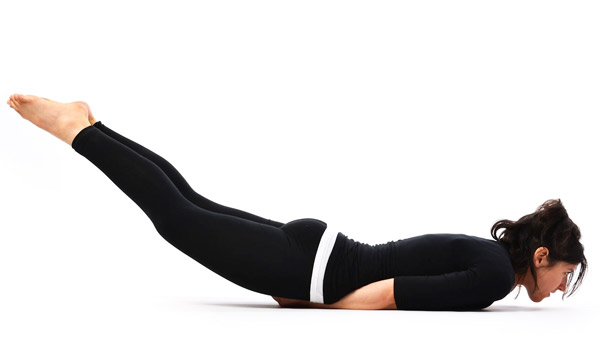
- Lie on your belly, with the chin on the floor, legs together and arms alongside the body, with the palms down.
- Rock the hips from side to side to walk the arms underneath your body, so that the forearms are on the inside of the hip bones and the hands are under the thighs.
- Inhale and lengthen the legs, reaching the toes away from your body. Pull up the knee caps, squeeze the buttocks and engage mula bandha. Press the arms down into the floor and slowly lift the legs up towards the ceiling.
- Breathe and hold for 2-5 breaths.
- To release: exhale and slowly lower the legs to the floor. Turn the head to one side, slide the arms out from under your body and rest.
The following are some basic Asanas or Yoga Poses for people suffering from Obesity and Diabetes:
|
Disclaimer
The Content is not intended to be a substitute for professional medical advice, diagnosis, or treatment. Always seek the advice of your physician or other qualified health provider with any questions you may have regarding a medical condition.